

Table of Contents
- Why Overhead Reaching Is Restricted After Open-Heart Surgery
- Understanding Sternal Precautions and Sternotomy Recovery
- How Long Do Sternal Precautions Last
- Move in the Tube After Sternotomy: The Core Principle
- Practical Task-Specific Alternatives to Overhead Reaching
- Getting Dressed After Open-Heart Surgery: Adaptive Techniques
- Activities of Daily Living With Sternal Precautions
- Adaptive Equipment and Home Setup for Recovery
- When to Escalate Concerns: Safety Boundaries During Recovery
- Frequently Asked Questions
Last Updated: October 10, 2026
Why Overhead Reaching Is Restricted After Open-Heart Surgery
Reaching overhead after heart surgery puts stress on your sternum right when it's healing. Your breastbone was cut during open-heart surgery, and it needs time to fuse back together safely.
When you reach overhead, your chest muscles pull on the incision site. This can delay healing or cause complications. That's why doctors give you sternal precautions, a set of movement rules that protect your recovery.
Think of your sternum like a bone fracture, you wouldn't stress a broken arm by lifting heavy weights. Following these guidelines for 6 to 12 weeks keeps you safe while your body heals.
Most daily tasks have safe alternatives that work just as well during recovery.
Understanding Sternal Precautions and Sternotomy Recovery
A median sternotomy is the surgical cut down the middle of your chest to access your heart. Sternal precautions limit movements, overhead reaching, pulling, pushing, and twisting, that could stress your healing incision. Recovery happens in stages: restrictions are strictest early on, then gradually ease as your sternum strengthens. Your surgeon or occupational therapist will provide a personalized list based on your surgery type.
How Long Do Sternal Precautions Last
Sternal precautions typically last 6 to 12 weeks after open-heart surgery, depending on your individual healing, surgery type, age, bone quality, and overall health.
The typical recovery timeline
Weeks 1 to 3: Strict precautions phase
During the first three weeks, your sternum is at its most fragile as bone edges begin to fuse. Restrictions are strictest during this phase.
- No overhead reaching or pulling
- No lifting more than 5 to 10 pounds
- No pushing or pulling with your arms
- Limited twisting or bending
- Arm movement stays close to your body (Move in the Tube)
- Most daily tasks require help or adaptive tools
Your surgeon or occupational therapist will give you a personalized list of restrictions based on your surgery type. Follow these exactly. This phase is critical for proper bone fusion.
Weeks 4 to 6: Early progression phase
By week 4, your sternum has begun to fuse more solidly. Your surgeon may gradually increase what's safe.
- You may be cleared to lift up to 10 to 15 pounds
- Some overhead reaching may be permitted, depending on your surgeon's clearance
- You can begin gentle range-of-motion exercises if prescribed by your physical therapist
- Daily activities become easier, though you still avoid heavy lifting and forceful movements
- Pain and discomfort typically decrease during this phase
Wait for explicit clearance from your surgeon or physical therapist before increasing activity, don't assume you're ready just because you feel better.
Weeks 7 to 12: Advanced progression phase
By week 7 to 8, most people are cleared to resume normal overhead reaching and light lifting as the sternum significantly strengthens.
- Overhead reaching is usually permitted
- Lifting restrictions may increase to 20 to 25 pounds
- You can return to most daily activities
- Exercise and activity can increase, following your surgeon's guidelines
- Some people are cleared to return to work or driving
Your surgeon will confirm when you've reached this phase, don't rush it, as your sternum may still be vulnerable.
After 12 weeks: Return to normal
By 12 weeks, most people have completed sternal precautions and can resume normal activities, though complete bone remodeling continues for months.
- No lifting restrictions (unless your surgeon specifies otherwise)
- Normal overhead reaching and arm movement
- Return to exercise, sports, and physical activity (with gradual progression)
- Return to work and normal daily life
Your surgeon will confirm when you've reached this milestone, as some people progress faster than others.
Factors that affect your timeline
Your individual healing speed depends on several factors.
Factors that may speed healing:
- Younger age (bone fuses faster in younger people)
- Good overall health and fitness before surgery
- Excellent nutrition during recovery
- No smoking or tobacco use
- Following precautions exactly as prescribed
- Consistent physical therapy and exercise
- Low stress and good sleep
Factors that may slow healing:
- Older age (bone fusion naturally slows with age)
- Smoking or tobacco use (reduces blood flow and delays healing)
- Poor nutrition or inadequate protein intake
- Diabetes or other chronic conditions
- Osteoporosis or weak bone quality
- Obesity (increases stress on the sternum)
- Ignoring precautions or pushing too hard too fast
- Infection or complications at the incision site
- High stress or poor sleep
Discuss your expected timeline with your surgeon if you have any of these risk factors.
How to know when you're cleared for more activity
Always wait for explicit clearance from your surgeon or physical therapist before increasing activity.
Signs that you're progressing well:
- Pain and discomfort are decreasing
- You can move your arms with less stiffness
- Your incision is healing without signs of infection
- You're sleeping better and have more energy
- Your physical therapist says you're ready
When to ask your surgeon about increasing activity:
- At your 2-week follow-up appointment
- At your 4-week follow-up appointment
- At your 6-week follow-up appointment
- At your 8-week follow-up appointment
- At your 12-week follow-up appointment
Your surgeon will examine your incision, assess your healing, and tell you what's safe next.
Red flags that mean you need to slow down:
- Increased pain or swelling at your incision
- Increased redness, warmth, or drainage from your incision
- Chest pain or pressure
- Shortness of breath
- Irregular heartbeat
- Fever
Contact your surgeon immediately if you experience any of these warning signs.
Why you shouldn't rush your timeline
Ignoring sternal precautions too early can lead to sternal separation (requiring additional surgery), infection, delayed fusion, or chronic pain. The 6-to-12-week timeline is based on how long bone fusion actually takes and gives you the best chance of a strong recovery.
Move in the Tube After Sternotomy: The Core Principle
The Move in the Tube is the foundation of safe movement during sternal precautions. Imagine a tube running down the center of your body, safe movement happens inside this tube. Keep your elbows bent and arms close to your body, moving forward and back rather than side to side. Avoid reaching across your body, twisting your torso, or pulling your arms backward or overhead. This principle applies to almost every activity during recovery.
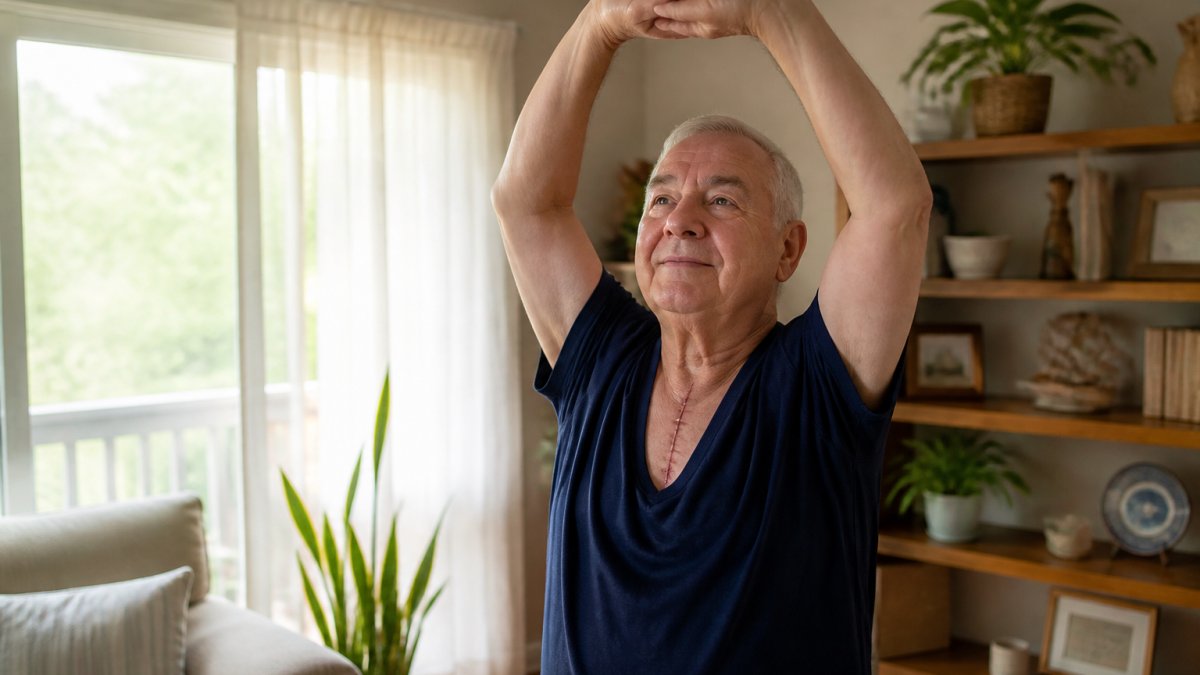
Practical Task-Specific Alternatives to Overhead Reaching
Overhead reaching is one of the most common daily tasks, and one of the most restricted after surgery. The good news is that simple tools, rearrangement, and modified techniques solve this problem for nearly every scenario. Below are the most frequent overhead tasks, step-by-step alternatives, and the tools that make them safe.
Retrieving items from high shelves and cabinets
The challenge: Reaching overhead stresses your sternum and can pull on your healing incision.
Step-by-step alternative:
-
Use a reacher or grabber tool. These extend your reach by 26 to 32 inches without overhead arm movement. Hold the handle at chest level and squeeze the trigger to open and close the jaws. Quality reachers cost $15 to $25.
-
Rearrange your home before surgery. Move frequently used items to waist-level shelves and cabinets. Keep everyday dishes, glasses, and food at arm's level (36 to 48 inches from the floor).
-
Ask for help during the first 2 to 3 weeks. Family members or friends can retrieve items from high shelves until your sternum is stronger.
Common mistake: Trying to reach overhead "just a little bit." Even small overhead reaches stress your healing sternum. Use the reacher instead.
Hanging clothes and accessing closets
The challenge: Closet access requires overhead reaching and pulling your arms behind your back, both restricted movements.
Step-by-step alternative:
-
Move your everyday clothes to a lower rod or shelf before surgery. Hang your most-worn items at shoulder height (roughly 60 inches from the floor).
-
Consider a rolling clothes rack for your bedroom during recovery. A portable rack costs $30 to $60 and holds 10 to 15 outfits, keeping your favorite items visible and reachable.
-
Wear button-up shirts and loose pants during early recovery. Avoid pulling clothes over your head.
Avoid these tasks during the first 6 weeks: Hanging new items, reaching behind your back to fasten clothing, or pulling heavy coats from high rods. Your surgeon will tell you when overhead reaching is safe again, usually around week 6 to 8.
Washing hair and personal grooming
The challenge: Hair washing involves reaching overhead and lifting your elbows high, both movements that stress your sternum.
Step-by-step alternative:
-
Wash your hair while sitting. Sit in a sturdy chair or on the edge of your bathtub and use a handheld showerhead to rinse without reaching overhead.
-
Ask someone to help during the first 2 to 3 weeks. A helper can control water temperature and flow.
-
Use dry shampoo or spray as a short-term solution. These products cost $5 to $10 and reduce how often you need to wash during early recovery.
-
Air dry your hair. Avoid blow-drying if it requires holding your arms overhead.
Common mistake: Trying to wash your hair in the shower while standing often leads to reaching overhead or losing balance. Sit instead. Your surgeon will let you know when overhead reaching is safe, usually around week 6 to 8.
Retrieving objects from the floor or low surfaces
The challenge: Bending to pick up objects can strain your incision if you bend too far or twist your torso.
Step-by-step alternative:
-
Use a reacher for lightweight items. A grabber tool works for low items as well as high ones.
-
Bend at your knees, not your waist. Keep your back straight and avoid twisting while bent.
-
Ask for help with heavier items. Don't try to pick up laundry baskets or grocery bags during early recovery.
-
Rearrange your space to minimize bending. Keep frequently used items at waist height. Your surgeon will tell you when normal bending is safe, usually around week 6 to 8.
Dressing and undressing
The challenge: Pulling shirts over your head and reaching behind your back to fasten buttons or zippers stresses your sternum.
Step-by-step alternative:
-
Wear button-up shirts and loose pants during early recovery. Button-front clothing lets you dress one arm at a time without overhead reaching. Elastic-waist pants eliminate the need to bend and pull.
-
Dress your weaker or more painful arm first. If one side is more sore, put that arm through sleeves first. This reduces strain on the stronger side.
-
Use adaptive aids for socks and shoes. A sock aid slides a sock onto your foot without bending. A long shoehorn (18 to 24 inches) lets you put on shoes without reaching down. These tools cost $10 to $30 each and are available at medical supply stores.
-
Sit while dressing. Sitting reduces balance risk and lets you move slowly. Standing while dressing increases the temptation to reach or twist.
-
Avoid fasteners that require two hands or overhead reaching. Zippers are easier than buttons during early recovery. Magnetic closures or velcro work too.
Common mistake: Trying to pull a shirt over your head "just this once." Even one overhead reach can stress your healing sternum. Stick to button-up clothing until your surgeon clears overhead movement.
When you're cleared for normal dressing: Your surgeon will tell you when you can resume wearing regular clothing and pulling shirts over your head. This is usually around week 6 to 8.
Getting Dressed After Open-Heart Surgery: Adaptive Techniques
Getting dressed feels simple until you can't reach overhead or pull your arms behind your back. These techniques make dressing safe and manageable.
Start with loose, button-front clothing. Avoid pulling shirts over your head. Button-up shirts let you dress one arm at a time without overhead reaching. Loose pants with an elastic waist eliminate the need to bend and pull.
Dress your weaker or more painful arm first. If one side is more sore, put that arm through sleeves first. This reduces strain on the stronger side.
Use adaptive aids for socks and shoes. A sock aid slides a sock onto your foot without bending. A long shoehorn lets you put on shoes without reaching down. These tools cost $10 to $30 and are worth the investment.
Sit while dressing. Sitting reduces balance risk and lets you move slowly. Standing while dressing increases the temptation to reach or twist.
Avoid fasteners that require two hands or overhead reaching. Zippers are easier than buttons during early recovery. Magnetic closures work too.
Activities of Daily Living With Sternal Precautions
Safe movement patterns for arm use
Daily living involves hundreds of small arm movements. Most are safe if you follow the Move in the Tube principle.
Safe movements include:
- Eating and drinking with your arms at table height
- Washing your face and brushing your teeth
- Typing or writing at a desk
- Holding a phone at ear level
- Combing your hair from the front, not overhead
- Carrying light items close to your body
Unsafe movements include:
- Reaching overhead or to the sides
- Pulling your arms behind your back
- Lifting your elbows above shoulder height
- Twisting your torso while moving your arms
- Reaching across your body with force
When in doubt, ask your physical therapist. They can show you safe alternatives for any activity.
One-arm versus two-arm techniques
Sometimes you need to use both arms. The key is doing it safely.
Two-arm movement is safer than one-arm movement when you must use both hands. Use both arms equally and keep them close to your body. This distributes the load and reduces strain on your sternum.
One-arm tasks are fine for light activities. Holding a phone, eating, or writing uses one arm safely. Keep your arm close to your midline.
Avoid one-arm lifting or carrying. This creates imbalance and pulls on your sternum. If you must carry something, use both hands and keep it close to your body.
Your occupational therapist can teach you the safest technique for any task you're struggling with.
Adaptive Equipment and Home Setup for Recovery
Simple equipment makes recovery easier and safer. Most items are inexpensive and widely available.
Essential tools during early recovery:
- Reacher or grabber (access high items)
- Sock aid (dress without bending)
- Long shoehorn (put on shoes safely)
- Pillow for splinting (support your chest when coughing or moving)
- Shower chair (bathe safely without reaching or balancing)
- Elastic-waist pants and button-up shirts (easy dressing)
Home setup tips:
Arrange your bedroom and bathroom for easy access. Keep your bed at a height that lets you sit and stand without straining. Place a nightstand within arm's reach for water, medications, and a phone.
In the bathroom, install grab bars near the toilet and shower. A shower chair is essential. Keep towels and toiletries at waist level.
In the kitchen, move frequently used items to shelves at arm height. Keep a stool nearby for sitting while preparing food.
These small changes remove the need to reach, bend, or strain during your recovery.
When to Escalate Concerns: Safety Boundaries During Recovery
Know the warning signs that mean you should contact your surgeon or cardiologist immediately.
Seek immediate help if you experience:
- Chest pain or pressure that feels different from normal post-surgery discomfort
- Increased swelling, redness, warmth, or drainage from your incision
- Fever over 101°F
- Shortness of breath that's worse than before
- Irregular heartbeat or chest palpitations
- Severe fatigue or dizziness
- Signs of infection like increased warmth or pus at the incision site
Contact your surgeon within 24 hours if you notice:
- Minor increased swelling or bruising
- Mild itching or numbness around the incision
- Small amounts of clear fluid from the incision
- Questions about your activity level or restrictions
When in doubt, call. Your medical team would rather hear from you about a minor concern than have you ignore something serious.
The Zipper community is here to support your emotional recovery too. Many survivors struggle with anxiety after surgery. Connecting with others who've been through this can help you feel less alone and more confident in your healing.
Recovery after open-heart surgery is a marathon, not a sprint. Sternal precautions protect your sternum while it heals, and reaching overhead after heart surgery can be safely managed with simple alternatives and adaptive tools. The restrictions are temporary, usually 6 to 12 weeks, but they're essential for a strong recovery. Work with your surgeon and physical therapist to understand your specific restrictions, use the tools and techniques outlined here, and be patient with yourself. Your body is rebuilding itself right now. Honor that process, and you'll reclaim your strength.
Frequently Asked Questions
What can I do instead of reaching overhead after heart surgery?
Use reachers, ask family for help, reorganize frequently used items to waist-chest height, and use the Move in the Tube principle to keep arm movements close to your body. Adaptive equipment like sock aids and long-handled sponges eliminates the need to reach overhead for many daily tasks. Always follow your surgeon's individualized precautions, as restrictions vary based on your specific procedure and healing progress.
How long do sternal precautions last after open-heart surgery?
Most patients follow sternal precautions for 6 to 8 weeks after surgery, though this timeline varies. Your surgeon provides individualized guidance based on your healing rate and specific cardiac procedure. Some patients receive clearance earlier; others need extended precautions. Never assume you can stop precautions without explicit approval from your cardiologist or cardiac surgeon, as premature overhead reaching risks sternal complications.
Is the Move in the Tube approach safe for all activities of daily living?
The Move in the Tube principle, keeping arm movements in an imaginary vertical cylinder in front of your body, is a core guideline for most sternal precautions. It prevents excessive twisting, pulling, and reaching that stress the sternotomy incision. However, activities of daily living vary in complexity. Your occupational therapist or cardiac rehabilitation team can show you how to adapt specific tasks like dressing, bathing, and grooming safely within this framework.
What adaptive equipment helps when getting dressed after open-heart surgery?
A sock aid, reacher, button hook, and long-handled shoehorn eliminate overhead and low reaching during dressing. Loose, front-opening clothing (button-up shirts, cardigans) reduces the need to pull items over your head. Slip-on shoes or elastic shoelaces simplify footwear. These tools help you maintain independence while protecting your sternum during the critical healing phase. Your occupational therapist can recommend specific items suited to your home setup.


